

Aloe Vera: Succulent Houseplant and First-Aid Kit
Aloe vera (syn. Aloe barbadensis miller) is the most widely cultivated succulent in the world, grown for its medicinal gel, ornamental value, and remarkable ease of care. Native to the Arabian Peninsula, it has been carried by humans for so long that its exact wild origin is now uncertain — it has naturalized across the Mediterranean, India, the Caribbean, and the southwestern United States.
Mature plants form a dense rosette of thick fleshy leaves 30–60 cm tall, edged with small soft teeth. Under good conditions a healthy aloe produces a tall spike of yellow or orange tubular flowers in late winter or spring, though indoor plants rarely bloom. The leaves contain a clear gel in their inner parenchyma cells that has been used for burns, wounds, and skin conditions for at least 2,000 years.
💡 Tip
Aloe vera is one of the few houseplants that earns its keep — a single healthy leaf can provide enough fresh gel to treat a minor burn or sunburn within seconds of being snapped off the plant.
Light: Bright but Not Always Direct
Aloe vera loves bright light and tolerates some direct sun, but indoor plants need gradual acclimation. A plant kept in low light and suddenly moved to a south-facing window will scorch within a day. Move plants gradually: a week in an east window, then a week with morning sun only, then full sun if desired.
The sweet spot for most homes is a south or west window with a sheer curtain filtering the strongest afternoon rays, or an east window where the plant receives direct morning sun and bright indirect light the rest of the day. In insufficient light, the leaves grow long, thin, and pale green rather than staying compact and grey-green. This is called etiolation and is the most common indoor aloe problem.
Watering and the Soak-and-Dry Cycle
Aloe vera uses the same watering strategy as other succulents: soak the soil thoroughly, then wait until it is completely dry before watering again. In summer this is typically every 10–14 days; in winter, every 3–4 weeks. Push a chopstick or skewer all the way to the bottom of the pot — if it comes out with any soil sticking to it, wait another week.
The leaves themselves are a watering gauge. Plump, firm leaves that stand upright mean the plant is well hydrated. Leaves that feel soft, look slightly wrinkled, or curl inward at the edges mean the plant is using its stored water and is ready for a drink. Leaves that are mushy at the base or fall over mean the plant has been overwatered and is rotting — see the problems section below.
⚠️ Warning
Never let aloe vera sit in a saucer of water. The roots rot within hours, and the rot spreads up through the leaves faster than the plant can defend itself. Always empty the saucer 15 minutes after watering.
Soil and Pots
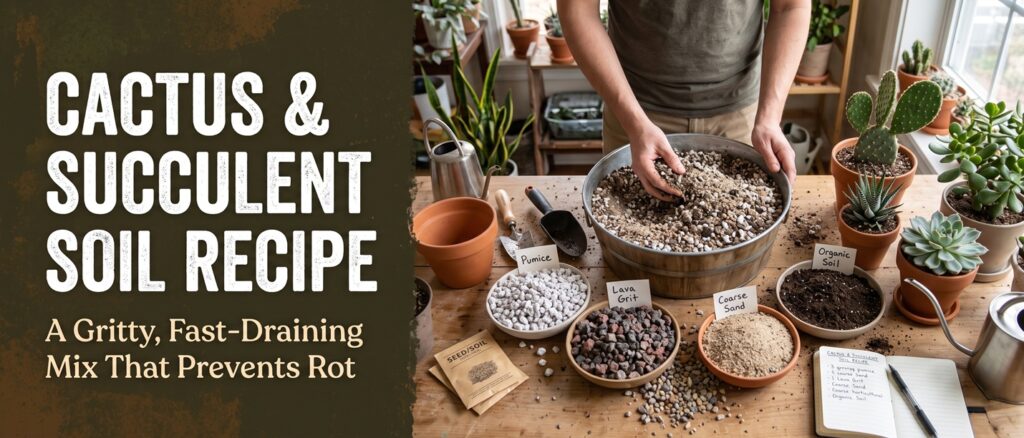
Use a gritty succulent mix — 2 parts pumice, 1 part calcined clay, 1 part coco coir, 1 part perlite. Standard cactus potting soil from the garden center is acceptable but benefits from being cut 50/50 with additional pumice or perlite. The mix should drain in seconds when watered.
Terra-cotta is the ideal pot material for aloe vera because it wicks moisture away from the soil and allows oxygen to reach the roots. Plastic pots work but keep the soil too wet for too long. Choose a pot only slightly larger than the root ball — aloes prefer being potbound and rarely need repotting. Ensure the pot has at least one generous drainage hole.
Propagation by Pups
Mature aloe vera plants produce offsets — called pups — around their base. These are genetically identical clones that can be separated and grown as new plants. A single healthy aloe produces 3–8 pups per year, so you will never need to buy a second plant.
How to separate and pot aloe pups:
- Wait until the pup is at least 10–15 cm tall with several leaves of its own. Smaller pups have a lower survival rate.
- Unpot the entire plant and brush away soil from the root system. Find where the pup attaches to the mother plant.
- Use a sterile knife to cut the pup free, including any roots of its own. Let the cut surface dry for 24 hours to form a callus.
- Pot the pup in dry succulent mix and wait a week before watering. The callus prevents rotting at the cut surface.
- Water sparingly for the first month, then transition to normal succulent watering.
Harvesting and Using the Gel
To harvest aloe gel for first-aid use, select an outer leaf that is at least 15 cm long. Cut it close to the base with a clean knife, then stand the cut end down in a glass for 10 minutes to let the yellow latex drain out — this latex is a strong laxative and irritant, so it must be drained before use. Slice the leaf lengthwise and scoop out the clear gel with a spoon.
Fresh gel can be applied directly to burns, sunburns, minor cuts, and insect bites for instant cooling and healing. Unused gel keeps in the refrigerator for up to a week in an airtight container. Do not consume aloe vera latex or gel internally without consulting a healthcare provider — the laxative compounds are potent and can cause severe cramping and electrolyte imbalance.
💡 Tip
Plants grown in brighter light produce leaves with thicker, more medicinally active gel. If you grow aloe primarily for first-aid use, give it as much direct sun as it will tolerate.
Common Problems
Thin, droopy leaves indicate insufficient light. Move the plant gradually to a brighter spot and new leaves will grow in thicker and more upright. Brown dry tips on leaves usually mean the plant has dried out completely at some point, or that the water has too much dissolved mineral content. Trim the brown tips with sterile scissors and switch to filtered water.
Mushy leaves that fall over at the base indicate rot from overwatering. Unpot the plant immediately, cut away all soft brown tissue with a sterile knife until you reach firm white tissue, let the plant dry for 2–3 days, then repot into fresh dry succulent mix. Do not water for 2 weeks after this rescue — the plant needs to grow new roots before it can take up water again.
Flat, pale leaves lying close to the soil surface mean the plant is not getting enough light. White cottony patches on the leaves are mealybugs — treat by dabbing with a cotton swab dipped in rubbing alcohol, then spray the whole plant with insecticidal soap weekly until no signs remain.
Only logged-in users can comment
Sign in or create a free account to join the conversation — it takes less than a minute.