
Why Overwatering Is the Number One Houseplant Killer
Overwatering kills more houseplants than every other cause combined. The reason is counterintuitive: plants do not die from too much water, they die from too little oxygen. When soil is constantly saturated, the air pockets that normally exist between soil particles fill with water, and the roots suffocate. Within 24-48 hours of oxygen deprivation, root cells begin to die. Within a week, opportunistic fungi and bacteria colonize the dead tissue, turning healthy white roots into black mush. This is root rot, and it is almost always fatal if not caught early.
The cruel irony is that the symptoms of overwatering look identical to the symptoms of underwatering — wilting, yellowing, leaf drop — because in both cases the root system cannot deliver water to the leaves. Owners see a wilting plant and water it more, accelerating the rot. By the time the plant visibly collapses, the root system is often 70-80 percent dead, and recovery requires immediate and aggressive intervention. The good news is that most overwatered plants can be saved if you act within a day or two of noticing the problem.
💡 Tip
The single most reliable sign of overwatering is soil that stays wet for more than 5-7 days after watering. If you press your finger into the soil a week after watering and it feels damp or muddy, the plant is being overwatered — even if the leaves look fine. Catch the problem at this stage and the rescue is straightforward; wait for visible leaf collapse and the prognosis gets much worse.
Diagnosing: Is It Really Overwatering?
Before you unpot a plant, confirm that overwatering is actually the problem. Several other issues produce similar symptoms: underwatering, pest infestation, cold damage, fertilizer burn, and root-bound stress all cause wilting and yellowing. The diagnostic test is simple: stick your finger 5 cm (2 inches) into the soil. If the soil is bone dry, the plant is underwatered — water it deeply and the leaves should perk up within 24 hours. If the soil is wet, muddy, or has a sour smell, the plant is overwatered and needs rescue.
Other diagnostic signs support the soil test. Lift the pot — a waterlogged pot is noticeably heavier than a properly watered one. Look at the soil surface — green algae or fungus gnats flying around the pot are signs of chronic wetness. Check the lower leaves — overwatered plants yellow from the bottom up, while underwatered plants yellow more evenly. Smell the drainage holes — a sour, swampy, or sulfurous smell means anaerobic decomposition has started in the root zone.
Definitive signs of overwatering / root rot:
- Soil is still wet 5-7 days after watering
- Leaves are yellowing from the bottom of the plant upward
- Leaves feel soft and mushy, not crisp
- Stems are soft at the soil line
- Soil surface has green algae or white fuzzy mold
- Fungus gnats are present around the plant
- Pot is unusually heavy when lifted
- Drainage holes emit a sour or sulfurous smell
- Plant wilts despite wet soil (root rot prevents water uptake)
Step 1: Unpot the Plant Immediately
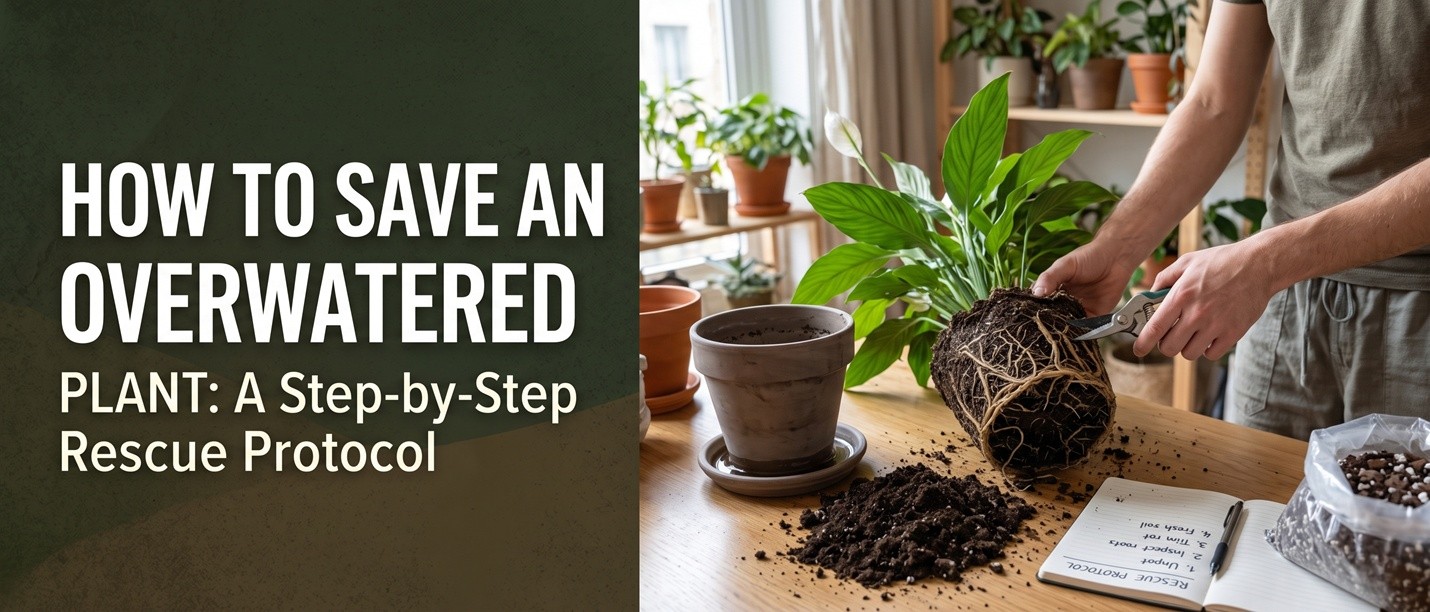
The moment you confirm overwatering, unpot the plant. Every hour the roots sit in saturated soil accelerates the rot. Tip the pot on its side, gently squeeze flexible plastic pots to break the soil seal, or run a knife around the inside of rigid pots. Slide the root ball out intact — do not pull the plant by the stems, which can break. If the root ball is waterlogged and falling apart, this is actually a good sign because it means the soil is too degraded to hold the plant anyway, and removing it will be easier.
Once the plant is out of the pot, gently wash all the old soil off the roots with room-temperature water. Use a hose on gentle spray, a kitchen sink sprayer, or a bucket of water changed several times. The goal is to see the roots clearly so you can identify what is healthy and what is rotting. Do not skip this step — leaving old soil on the roots means leaving the pathogens and anaerobic conditions that caused the rot in the first place.
Step 2: Inspect and Trim the Roots
With the roots clean, you can now see the damage clearly. Healthy roots are firm, white or pale tan, and have a slight elasticity when you bend them gently. Rotting roots are brown or black, soft, slimy, and fall apart when touched. The contrast is usually obvious once you have both in hand. If you are not sure whether a root is healthy, squeeze it gently — healthy roots feel firm like a fresh carrot, rotting roots feel soft like a wet sponge.
Using sterilized scissors or pruning shears (wipe with rubbing alcohol between cuts), trim away every root that is brown, black, soft, or mushy. Cut back into healthy tissue — make your cut 1 cm (half inch) above the visible rot, into firm white root. This ensures you remove all the infected tissue, because rot spreads invisibly inside the root ahead of the visible damage. Do not be conservative — better to remove too much and have a smaller healthy root system than to leave rot behind and lose the plant entirely.
⚠️ Warning
If more than 70 percent of the root system is rotted, the plant may not be salvageable. You can try the rescue anyway, but set realistic expectations. Plants with extensive rot often survive the immediate rescue but fail to recover and slowly decline over weeks. If the entire root ball is black mush with no healthy tissue, propagate cuttings from the healthiest stems instead of trying to save the original plant.
Step 3: Treat with Fungicide (Optional but Recommended)
After trimming, soak the remaining root system in a fungicide solution for 10-15 minutes. This kills any remaining root rot pathogens and prevents them from re-infecting the plant in fresh soil. The two most accessible options are 3 percent hydrogen peroxide diluted 1:3 with water (1 part peroxide to 3 parts water), or a commercial fungicide containing thiophanate-methyl. Hydrogen peroxide also delivers a burst of oxygen to oxygen-starved roots, which helps them recover.
If you do not have either on hand, you can skip this step, but the rescue success rate drops noticeably. As a minimum intervention, dust the cut root ends with cinnamon powder, which has natural antifungal properties. After the soak, let the roots air-dry for 1-2 hours in a shaded, well-ventilated spot. The cut ends need to callus over slightly before repotting to reduce the risk of fresh rot in the new soil.
Step 4: Repot in Fresh, Dry, Well-Draining Mix
Throw away the old soil — it is contaminated with pathogens and structurally degraded. Wash the old pot with hot soapy water and a splash of bleach, or use a clean new pot one size smaller than the original. Going down a pot size is critical because the trimmed root system is smaller and a too-large pot stays wet too long, recreating the overwatering conditions. Choose a pot with drainage holes — no exceptions.
Use a fresh, well-draining potting mix appropriate for the plant species. For most tropical foliage plants, a mix of 60 percent potting soil, 30 percent perlite or pumice, and 10 percent orchid bark or coco chips drains fast enough to prevent future rot. For succulents and cacti, use 50 percent potting soil and 50 percent perlite or pumice. Moisten the new mix slightly before potting — it should feel like a wrung-out sponge, not wet enough to drip. Plant at the same depth as before, firm the soil gently, and do not water immediately.
Step 5: The Recovery Period (4-8 Weeks)
After repotting, withhold water for 5-7 days. This forces the plant to push out new water-seeking roots, which is exactly what you want. The plant will look droopy during this period — that is normal and not a sign you need to water. Mist the leaves daily to reduce transpiration stress, and place the plant in bright indirect light out of direct sun. Direct sun increases transpiration and stresses the compromised root system further.
After 5-7 days, water gently — just enough to moisten the top half of the pot, not a thorough drenching. The goal is to keep the new roots slightly moist without saturating the soil. Over the next 4-8 weeks, water only when the top 5 cm (2 inches) of soil is dry, which may be every 10-14 days given the smaller pot and reduced root mass. Do not fertilize during recovery — the compromised roots cannot absorb nutrients and fertilizer will burn them. Resume normal care only after the plant shows clear new growth, which signals the root system is functioning again.
💡 Tip
The plant will look worse before it looks better. Expect additional leaf yellowing and drop in the first 2-3 weeks as the plant sheds foliage it cannot support with the reduced root system. New growth is the sign of recovery — once you see a new leaf unfurling, the rescue has succeeded and you can gradually return to normal care.
Preventing Future Overwatering
Once you have rescued a plant, change your watering habits so you never have to do it again. The single most important change is to never water on a fixed schedule — always check soil moisture first. Push your finger 5 cm (2 inches) into the soil; water only if it feels dry at that depth. If in doubt, wait another day. Plants tolerate dry soil far better than they tolerate wet soil.
Other preventive measures: ensure every pot has drainage holes (no exceptions, no double-potting without drainage), use a well-draining soil mix with at least 30 percent perlite, choose pots that match the root ball size (a pot more than 5 cm wider than the root ball stays wet too long), and empty drainage saucers 30 minutes after watering. With these habits, overwatering becomes nearly impossible, and your plants will thrive instead of just survive.


Only logged-in users can comment
Sign in or create a free account to join the conversation — it takes less than a minute.