
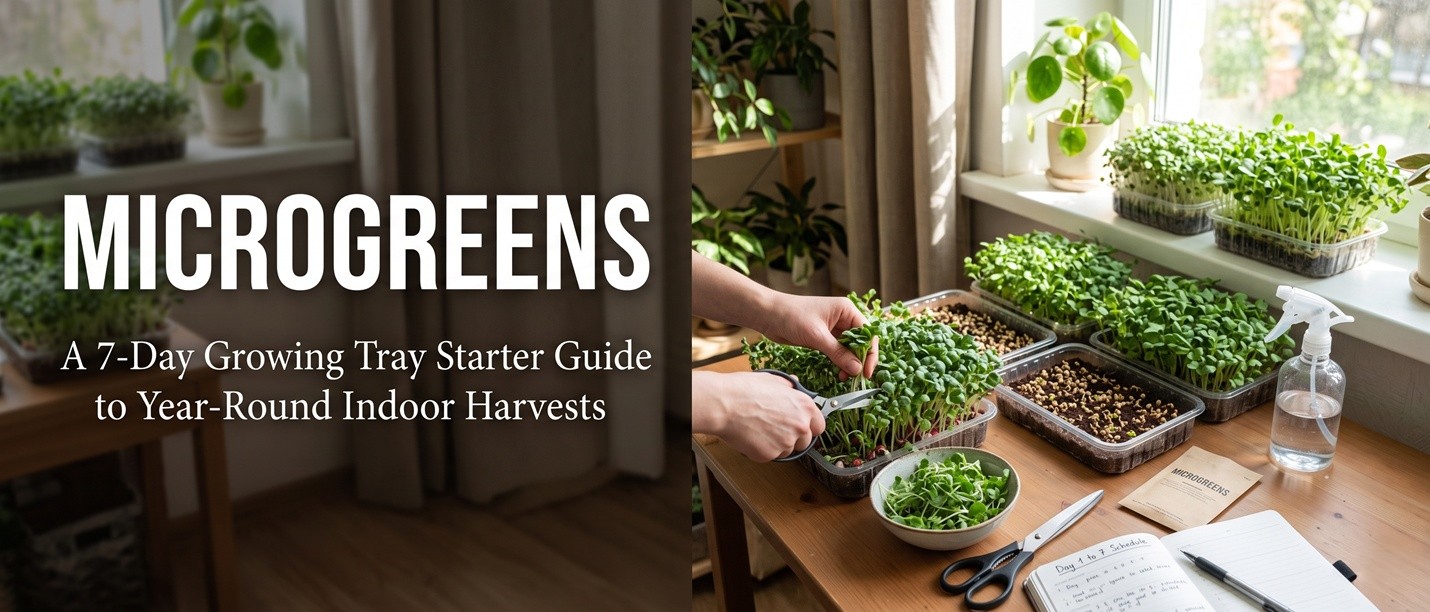
What Microgreens Actually Are (and Why They Are Not Sprouts)
Microgreens are vegetable and herb seedlings harvested 7-14 days after germination, when the first true leaves have just emerged. They are not sprouts (which are germinated seeds eaten whole, root and all, before any leaves appear) and not baby greens (which are harvested 3-4 weeks after germination when several true leaves have developed). Microgreens occupy a specific middle ground — they have a stem, two cotyledons (seed leaves), and the first one or two true leaves, all harvested together just above the soil line.
What makes microgreens worth growing at home is the combination of intense flavor, high nutrient density, and speed of harvest. A 2012 study from the University of Maryland found that microgreens contain 4-40 times the vitamin, mineral, and antioxidant levels of their mature counterparts, depending on the variety. Cilantro microgreens, for example, have 3 times the beta-carotene of mature cilantro. Red cabbage microgreens have 6 times the vitamin C of mature red cabbage. And all of this is available in 7-14 days from seeding, with no garden, no sunlight (a windowsill or grow light suffices), and minimal space.
💡 Tip
If you have ever killed a houseplant, microgreens are perfect for you. The total commitment is 7-14 days. If something goes wrong, you toss the tray and start over — no long-term care required. Even complete beginners can grow microgreens successfully on the first try, and a single 25×50 cm tray produces 100-200 grams of greens every two weeks.
The Best Microgreen Varieties to Start With
Not all vegetables make good microgreens. The best varieties germinate quickly, grow uniformly, develop intense flavor, and resist common microgreen problems like damping-off and mold. The four categories most growers start with are brassicas (fast, mild flavor, very nutrient-dense), radishes and mustards (fast, spicy, colorful), legumes (large seeds, satisfying crunch, milder flavor), and herbs (slower but unmatched flavor).
Best microgreen varieties for beginners:
- Broccoli — 5-7 day harvest, mild cabbage flavor, extremely high in sulforaphane (anti-cancer compound)
- Radish (Daikon, Red Rambo, Triton) — 5-7 day harvest, spicy kick, vibrant purple/red stems
- Sunflower — 7-10 day harvest, large crunchy leaves, nutty flavor, satisfying bite
- Pea shoots — 10-14 day harvest, sweet pea flavor, excellent in stir-fries and salads
- Mustard (Red Giant, Garnet Giant) — 6-8 day harvest, horseradish-like heat, beautiful purple leaves
- Arugula — 7-10 day harvest, peppery flavor, very easy to grow
- Cilantro — 14-21 day harvest (slower), intense cilantro flavor, slows bolting in summer
- Basil (Genovese, Purple, Lemon) — 14-21 day harvest, intense basil flavor, expensive to buy as mature
- Red cabbage — 7-10 day harvest, striking purple color, very high vitamin C
- Kohlrabi (Purple Vienna) — 7-10 day harvest, mild cabbage flavor, beautiful purple stems
⚠️ Warning
Do NOT grow microgreens from seeds treated with fungicides or pesticides (often sold for agricultural use). These chemicals are not safe for human consumption at the seedling stage. Only use untreated, food-grade seeds from a reputable microgreen supplier. Look for the words 'untreated' or 'organic' on the seed packet, and avoid seeds labeled for field planting only.
Soil vs Hydroponic Mats: Which Is Better?
Microgreens can be grown in soil or on hydroponic growing mats (jute, hemp, or burlap). Both methods work, and the choice comes down to personal preference and the varieties you are growing. Soil-based growing produces slightly more flavorful greens, supports a wider variety of species, and is cheaper — potting soil is essentially free if you have a garden. Hydroponic mats are cleaner, easier to harvest, eliminate soil-borne disease, and produce slightly faster growth, but the mats cost $0.50-1.00 per tray and cannot be reused.
For beginners, soil is the better choice. It is more forgiving — minor over- or under-watering is absorbed by the soil buffer, and most varieties grow well in it. Use a sterile seed-starting mix or a 50/50 blend of coco coir and perlite. Avoid regular potting soil with added fertilizer — the high nitrogen causes leggy, bitter greens. Hydroponic mats are worth trying once you have a few successful soil crops and want a cleaner harvest, but they require more precise watering and are less forgiving of mistakes.
Equipment You Need to Get Started
Basic microgreens setup (total cost $30-50):
- 2-3 shallow growing trays (25×50 cm / 10×20 inches) with drainage holes
- 2-3 matching trays without holes (to use as water reservoirs for bottom-watering)
- Small bag of sterile seed-starting mix or coco coir
- Spray bottle for misting seeds during germination
- Small kitchen scale (to weigh seeds for accurate sowing density)
- Plastic dome or humidity cover (often sold with seed-starting trays)
- Grow light (a $20 full-spectrum LED shop light works perfectly)
- Untreated microgreen seeds from a reputable supplier
- Optional: pH meter, fan for air circulation, thermometer/hygrometer
Step-by-Step: Planting Your First Tray
Start with broccoli or radish — they are the most forgiving varieties and have very high germination rates. Weigh out 15-20 grams of seed for a 25×50 cm tray (about 1.5-2 tablespoons). Soak the seeds in room-temperature water for 4-8 hours before planting — this dramatically improves germination rate and uniformity. While the seeds soak, fill the tray with 2-3 cm of moistened seed-starting mix, level the surface, and tamp it gently with a piece of cardboard to create a firm, even bed.
Planting steps:
- Spread the soaked seeds evenly across the soil surface (use a sieve for uniform distribution)
- Spray the seeds thoroughly with the spray bottle until the surface is wet
- Cover the seeds with a thin layer of soil (3-5 mm) OR leave uncovered if using the dome method
- Place a humidity dome or a second empty tray on top to create dark, humid germination conditions
- Stack a small weight (a book or another tray of soil, ~1 kg) on top for the first 2-3 days — this forces roots down and creates stronger seedlings
- Keep the tray in a warm location (20-25°C / 68-77°F) for 2-3 days until germination
- Once 80-90% of seeds have germinated, remove the weight and dome and move the tray under lights
- Bottom-water by adding 1-2 cm of water to the reservoir tray and letting the soil absorb it for 30 minutes
Light, Air, and Water: The Growing Phase
Once germinated, microgreens need 12-16 hours of light per day. A south-facing windowsill works in winter, but in summer the light is too intense and the air too dry. A simple LED shop light placed 5-10 cm above the tray is ideal — full spectrum or cool white both work, and a 4-foot dual-tube fixture covers two standard trays. Keep the light on a timer for consistency; irregular lighting causes leggy, weak seedlings.
Air circulation is critical to prevent mold. Run a small fan on low speed near the trays 24/7, positioned so it creates gentle air movement across the leaf surfaces without drying them out. This single intervention prevents 90% of mold problems. Water from the bottom only — add water to the reservoir tray and let the soil wick it up. Never spray the leaf surfaces after germination; wet leaves invite disease. Water every 1-2 days depending on tray size and growth stage; the soil should always be moist but never soggy.
Harvesting at the Perfect Moment
Microgreens are ready to harvest 7-14 days after planting, when the first true leaves have emerged but before the second set appears. The cotyledons (the first two rounded leaves) should be fully expanded, and the first true leaves (which look like miniature versions of the mature leaves) should be visible but still small. Harvest too early and the flavor is weak; harvest too late and the greens become tough and bitter.
To harvest, hold a sharp knife or scissors at a 45-degree angle just above the soil line and cut the stems in a single smooth motion. Avoid pulling — pulling tears the roots and brings soil up into the greens. Cut in small handfuls and immediately transfer to a clean bowl. Rinse the harvested greens in cold water to remove any seed coats or soil particles, then spin dry in a salad spinner or pat dry with paper towels. Store in a sealed container in the refrigerator for up to 7 days.
💡 Tip
The single best harvest tip: harvest in the morning before the plants have transpired much water. Microgreens harvested in the morning are crisper, sweeter, and store longer than those harvested in the afternoon. Avoid harvesting within 2 hours of watering — the extra moisture on the leaves encourages decay during storage.
Preventing Mold and Damping-Off
Mold is the most common microgreen problem, and it usually appears as a fuzzy white or gray growth on the soil surface around the stem bases. True mold grows on dead matter (seed coats, root debris) and is harmless but unsightly. Damping-off is a more serious fungal disease that attacks living seedlings, causing them to topple over at the soil line. Both problems are caused by excessive moisture, poor air circulation, and contaminated soil or seed.
Prevention is straightforward: use sterile seed-starting mix (not garden soil), run a fan 24/7 for air circulation, water from the bottom only, never let water sit in the tray longer than 30 minutes, and disinfect all trays and tools between crops with a 10% bleach solution. If you see fuzzy white growth, increase airflow and reduce watering — most 'mold' on microgreens is actually mycelium from the seed coats decomposing and will not harm the crop. If seedlings are toppling over, the crop is lost; discard the tray, disinfect, and start over with fresh soil and seed.
Economics: How Much Do Home-Grown Microgreens Cost?
A 25×50 cm tray of microgreens uses about 20 grams of seed, costs approximately $2 in materials (seed + soil + water + electricity), and produces 100-150 grams of harvested greens. Store-bought microgreens cost $30-50 for the same quantity. The economic case for home growing is overwhelming if you eat microgreens regularly. A $20 packet of broccoli seed (250 grams) produces 12-15 trays of microgreens — enough for a year of weekly harvests.
Beyond the economics, home-grown microgreens are fresher (you harvest and eat them the same day, versus store-bought which may be 5-7 days old), more varied (you can grow 30+ varieties that are never available in stores), and grown under your control (no pesticides, no plastic clamshell packaging, no refrigerated transport). For anyone interested in nutrition, sustainability, or just adding intense flavor to salads, sandwiches, and garnishes, microgreens are one of the highest-impact indoor gardening projects you can undertake.
Only logged-in users can comment
Sign in or create a free account to join the conversation — it takes less than a minute.