

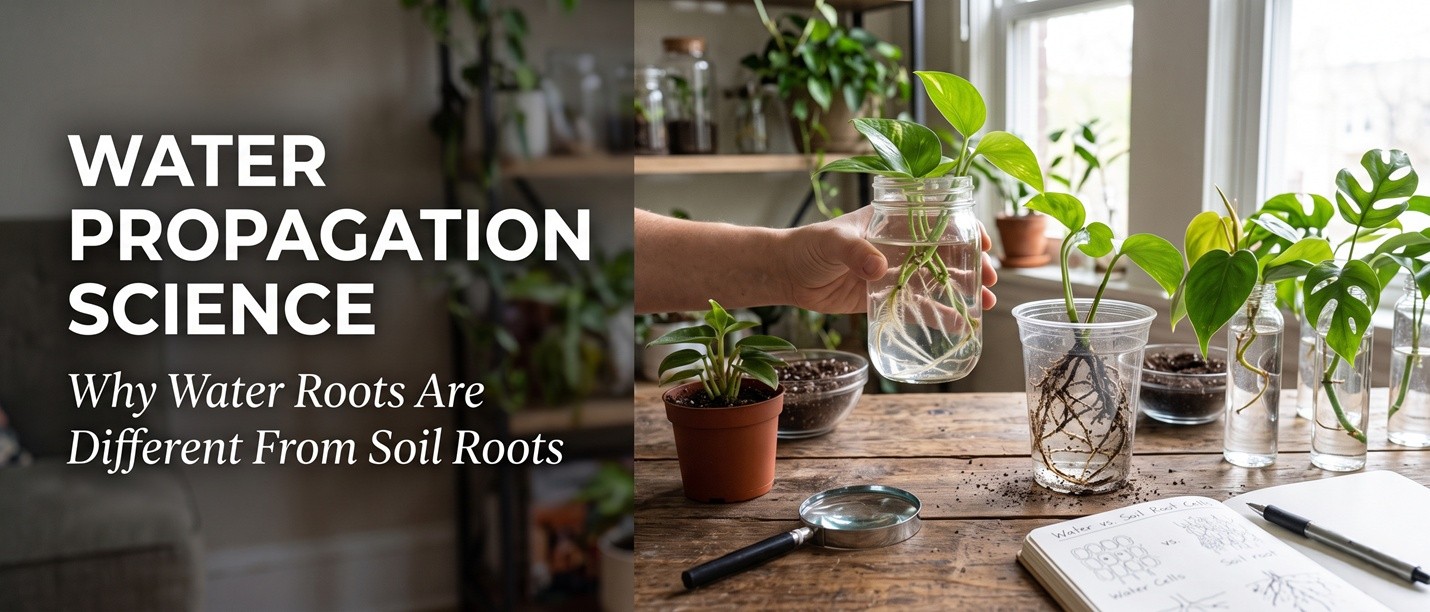
Water Propagation Works — But Not the Way You Think
Water propagation is the gateway propagation method for most houseplant owners. Drop a pothos cutting in a jar of water, wait two weeks, and roots appear like magic. It feels foolproof, which is why so many beginners are shocked when their carefully rooted cutting collapses within days of being moved to soil. The collapse is not bad luck or bad technique — it is a fundamental mismatch between the roots the cutting grew in water and the roots it needs to survive in soil.
Understanding the science of root development in different environments explains both the high success rate of water propagation and the high failure rate of transplanting water-rooted cuttings. The good news is that once you understand what is happening, you can adapt your technique to dramatically improve transplant success.
💡 Tip
If you have ever lost a beautiful water-rooted cutting within a week of potting it up, you are not alone — it is the single most common propagation failure. The fix is not better watering or better soil; it is understanding what kind of roots you grew.
Water Roots vs Soil Roots: Structural Differences
Roots are not generic organs — they develop differently depending on the medium they grow in. In water, roots experience constant moisture, low oxygen, no mechanical resistance, and no microorganisms. In soil, roots experience intermittent moisture, high oxygen, mechanical resistance from soil particles, and dense microbial communities. The same plant produces structurally different roots in each environment.
Water roots are thinner, more delicate, and have fewer root hairs (the microscopic filaments that absorb water and nutrients). Their cell walls are softer because they do not need to resist mechanical stress. The vascular tissue (xylem and phloem) is less developed because water is freely available and does not need to be transported against gravity. These roots are perfectly adapted to absorb water from a water environment, but they are poorly adapted to absorb water from soil.
Soil roots, by contrast, are thicker, sturdier, and covered in dense root hairs. Their cell walls are reinforced with lignin and suberin to resist mechanical stress. The vascular tissue is highly developed to move water from the drier soil environment up to the leaves. These roots are adapted to seek out water through dry pockets of soil and to absorb it against gravity.
Why Transplant Shock Happens
When you move a water-rooted cutting to soil, the water roots suddenly face an environment they were not built for. The soil is mechanically denser than water, so the delicate roots can be crushed during potting. The soil dries between waterings, and the water roots cannot extract moisture as efficiently as soil roots would — they lack the root hairs and reinforced vascular tissue needed to pull water from soil particles. The result is that the cutting, despite having visible roots, cannot take up enough water to support its leaves.
Meanwhile, the leaves continue to transpire water into the air. The cutting is losing water faster than its water roots can replace it from the soil. The leaves wilt, then crisp, then drop. The cutting collapses not because the soil is too dry or too wet, but because the roots it has are not the roots it needs.
⚠️ Warning
If your transplanted water-rooted cuttings consistently collapse, the problem is not your watering or your soil — it is the mismatch between water roots and soil environment. Adding more water will not fix it; the water roots cannot absorb the water you are giving them.
Three Strategies to Improve Transplant Success
Once you understand the problem, the solutions become clear. You can either help the water roots adapt, replace the water roots with soil roots, or skip water propagation entirely. Each strategy has trade-offs in speed, success rate, and effort.
Three reliable strategies for successful rooting and transplanting:
- Transition gradually: After water roots form, add a small handful of soil to the water jar every 2–3 days, gradually converting the medium from water to soil over 2 weeks. This forces the cutting to grow new roots adapted to the soilier medium, improving transplant success.
- Root directly in a soilless medium: Skip water entirely and root cuttings in perlite, vermiculite, or a mix of perlite and coco coir. These media are well-aerated and force the cutting to grow proper soil-type roots from the start. Success rates are higher and transplant shock is minimal.
- Take a two-step approach: Root in water for the easy first roots, then pot into a very loose mix of perlite and coco coir (70/30) kept consistently moist. The water roots die back as new soil-type roots grow. After 4–6 weeks, pot into a normal soil mix.
The Best Plants for Water Propagation
Some plants root so readily in water and transplant so easily that the science above barely matters. These are the plants that tolerate the water-root to soil-root transition with minimal shock — they grow new soil-type roots quickly enough to replace the water roots before the cutting runs out of water. These are also the best plants for beginners to practice propagation on.
Pothos, philodendron (trailing varieties), tradescantia, spider plants (the babies), and African violets all root effortlessly in water and transplant with high success rates. Heartleaf philodendron is nearly bulletproof — a cutting with one or two nodes will root in 7–10 days and can be potted up directly into soil with minimal losses.
At the other end of the spectrum, woody plants (ficus, rubber plants, dracaena), thin-leaved tropicals (Calathea, Maranta), and succulents root poorly in water and tend to rot before roots form. For these plants, use a soilless medium like perlite or a 50/50 perlite and coco coir mix, which provides both aeration and moisture without the rotting risk of standing water.
Optimal Conditions for Water Rooting
Even for easy-to-root plants, water propagation has optimal conditions. Use room-temperature water — cold tap water slows root development by several days. Change the water every 5–7 days to prevent bacterial growth that can rot the cutting. Use a clear glass jar so you can monitor root development, but keep the jar out of direct sun, which heats the water and promotes algae.
Add a small piece of activated charcoal to the water (available at aquarium stores) to absorb bacteria and prevent the water from going cloudy. Keep the cutting in bright indirect light at 22–26°C — warmer temperatures dramatically speed up root formation. A seedling heat mat under the jar can cut rooting time in half for slow species.
💡 Tip
For cuttings that take a long time to root (woody plants, slow tropicals), use a dark or opaque jar rather than clear glass. Roots grow in darkness in nature, and blocking light from the rooting zone can speed development by 30–40%.
When to Pot Up Water-Rooted Cuttings
The biggest mistake in water propagation is potting up too early. Roots that are just 1–2 cm long are not yet established enough to survive transplanting. Wait until the roots are at least 5 cm long, with multiple branches and root hairs visible. This usually takes 3–6 weeks for easy plants, longer for slower species. The longer you wait (within reason), the better the transplant success.
When potting up, use a light, well-draining mix — equal parts coco coir, perlite, and vermiculite works well. Do not use a heavy potting soil for the first pot. Keep the newly potted cutting in bright indirect light with slightly higher humidity (a loose humidity dome or plastic bag with holes) for the first two weeks. Water thoroughly when the top 2 cm of mix feels dry, and resist the urge to fertilize for the first month — the cutting needs to focus on root growth, not foliar growth.


Only logged-in users can comment
Sign in or create a free account to join the conversation — it takes less than a minute.